 My Photo Copy
To back up your iPhone before a trade-in, copy the photo library's originals to a USB drive, make sure every file is verified, check a few on another device, keep a second copy, and only then go to Settings → General → Transfer or Reset iPhone → Erase All Content and Settings. The erase takes minutes and can't be undone, so the backup comes first and gets checked before you touch it.
First, know where your photos actually are
Open Settings, tap your name, then iCloud, and see whether iCloud Photos is on.
- iCloud Photos is on. Your library is also in iCloud, and erasing the phone does not delete it. A copy on a drive is a second copy that doesn't depend on keeping the subscription. If Optimise iPhone Storage is on, many originals are only in iCloud and the phone holds smaller versions.
- iCloud Photos is off. The phone is the only place your library lives. If you erase without a backup, the photos are gone. This is the case where the drive matters most.
Photos saved only inside messaging apps are not part of the photo library. If there are WhatsApp or Telegram pictures you want, save them to Photos first.
What you need
- A drive with room to spare. Settings → General → iPhone Storage → Photos shows the library size. Buy about 1.5 times that. As a rough guide, a photo is around 3.5 MB and a video around 120 MB, but 4K and ProRes are much larger. See which USB drive fits your iPhone.
- exFAT format. FAT32 can't hold files over 4 GB, so long videos fail. How to format a drive for iPhone.
- The right connection. iPhone 15 and later take USB-C drives directly. iPhone 14 and earlier need a Lightning stick or Apple's Lightning to USB 3 Camera Adapter, plugged into power for larger drives.
- Time. A large library, especially with originals in iCloud, can take hours. Don't leave this for the morning of the trade-in appointment.
Step 1: Copy the originals
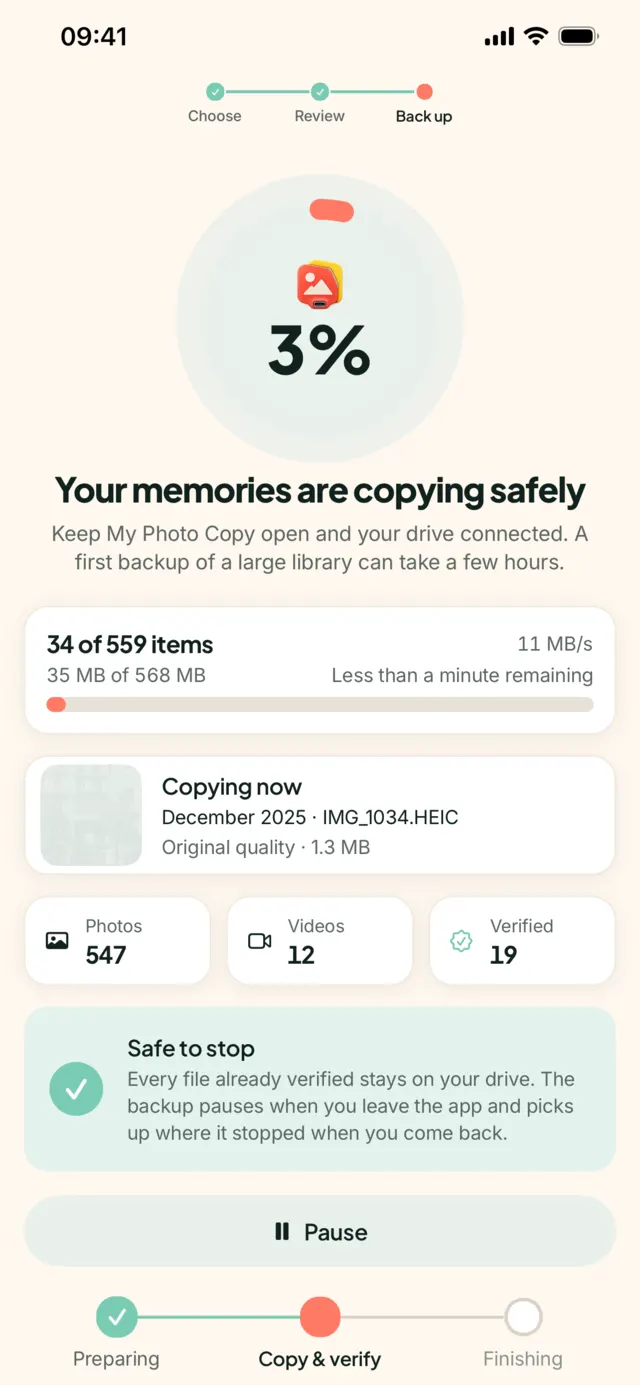
Plug in the drive and check that it appears in Files under Browse → Locations. In My Photo Copy, pick the drive and choose everything. For a trade-in, a partial backup is a bad idea.
If Optimise iPhone Storage is on, you don't have to switch it off. My Photo Copy downloads each iCloud original before copying it. That is what takes the time, so stay on Wi-Fi. iOS suspends apps that leave the screen, so keep the app open with the phone on a charger. If you need to stop, unplug and continue later; the next run starts where this one stopped.
Step 2: Make sure it is verified
When the run finishes, read the result. My Photo Copy reads every file back off the drive and checks it against the data your iPhone sent, and its size against what the photo library reports. You get a count like "9,316 originals verified" and a list of anything not copied, by name, with the reason.
Don't erase while that list has items you haven't dealt with. Fix the cause (usually an iCloud download that failed or a full drive) and run the backup again. It copies only what's missing. More on this in copied vs verified.
Step 3: Open files on another device
Plug the drive into a Mac, PC or TV. The files are in plain dated folders, like 2023/12/IMG_0915.HEIC. Open photos from several years, a long video, and whatever you would least like to lose. This takes five minutes and it is the last chance to find a problem while the phone still has everything.
Step 4: Make a second copy
One drive is one copy. Drives fail and get lost. Copy the drive to a second one, or run a second backup to another drive, and keep them in different places. If iCloud Photos is on, iCloud can count as that second place.
My Photo Copy does not restore into Photos. The drive holds plain files. To put them on the new phone, import them through Photos or Files yourself, or let iCloud Photos or Quick Start bring the library across.
Step 5: Erase the iPhone
Once the backup is verified and checked, Apple's steps are:
- If you have an Apple Watch, unpair it first.
- Go to Settings → General → Transfer or Reset iPhone.
- Tap Erase All Content and Settings.
- Enter your passcode, and your Apple Account password when asked. This signs you out and turns off Find My and Activation Lock as part of the erase.
- Wait for the phone to restart to the setup screen, then switch it off.
If the phone uses an eSIM, iOS asks whether to keep or remove it during the erase; if you are handing the phone over, remove it, or talk to your carrier first if you want to move the plan. Take out a physical SIM.
Common mistakes
- Assuming iCloud has everything. If iCloud Photos was off, or ran out of space months ago, it may not.
- Trusting a progress bar. A finished bar isn't a verified count.
- Using a FAT32 stick. Long videos over 4 GB silently don't fit.
- Erasing at the shop. Do the backup at home with time to check it.
Copy your photos before you erase
My Photo Copy copies your originals to a USB drive and verifies every file, with anything not copied listed by name. No computer, no cloud, no account. Free for the first 250 photos and videos.

For the full walkthrough of the backup itself, see iPhone USB backup without a computer. If your iCloud is also full, here are your options.