 My Photo Copy
To transfer photos from iPhone to USB, you don't need a computer. Plug a USB-C flash drive or SSD into the phone (or a Lightning stick into an older iPhone) and you can either save selected photos to it through the Files app, or use an app that copies your whole library and checks every file on the drive. The Files app is fine for a handful of pictures. If you want to back up photos you can't afford to lose, the second way is the one to trust.
Short version: an exFAT drive that shows up in Files. A few photos: Save to Files is enough. The whole library, or anything you'd miss: copy the originals with an app that verifies each file, then keep a second copy somewhere else.
Before you start: the drive
- iPhone 15 or later has USB-C. A USB-C flash drive plugs straight in, and a portable SSD needs only its USB-C cable.
- iPhone 14 or earlier has Lightning. Use a Lightning flash drive that appears in the Files app, or Apple's Lightning to USB 3 Camera Adapter with an ordinary drive and a charger plugged into the adapter.
- The format must be one the iPhone can write. exFAT works on iPhone, Mac and Windows. APFS is fine if the drive stays in the Apple world. FAT32 can't hold a file over 4 GB, so long 4K videos fail. NTFS can't be written to at all.
Open the Files app, tap Browse, and check that the drive is listed under Locations. If it isn't there, no method will work until it is; drive not showing up goes through the causes. Still choosing a drive? Which USB drive for iPhone compares sticks, SSDs and card readers. Wrong format? How to format a USB drive for iPhone.
Way 1: Save to Files, built into the iPhone
- Open Photos and tap Select. Pick the photos and videos you want.
- Tap the Share button, then Save to Files.
- Choose the drive under Locations, pick or create a folder, and tap Save.
It's free and already on your phone, and for a birthday's worth of photos it's perfectly good. The trouble starts when the selection gets big.
- No check at the end. Files tells you it finished, not what arrived. There's no count to compare and no list of anything that failed.
- No resume. If the drive slips out or the copy stalls, you're left with part of a folder and no record of where it stopped. You select again and hope you picked the right ones.
- Not always the originals. Depending on your settings you can end up with converted JPEGs, Live Photos saved as a still, or videos that never make it.
- All by hand. Selecting thousands of photos is slow, and next month you have to work out again which ones are new.
Way 2: My Photo Copy, for the whole library
My Photo Copy is an iPhone app built for this one job. It copies photos and videos from your library straight to the drive, with no computer, no cloud and no account.
- Plug in the drive and choose it as the destination.
- Choose what to copy: everything, a date range or month, some albums, or just the videos.
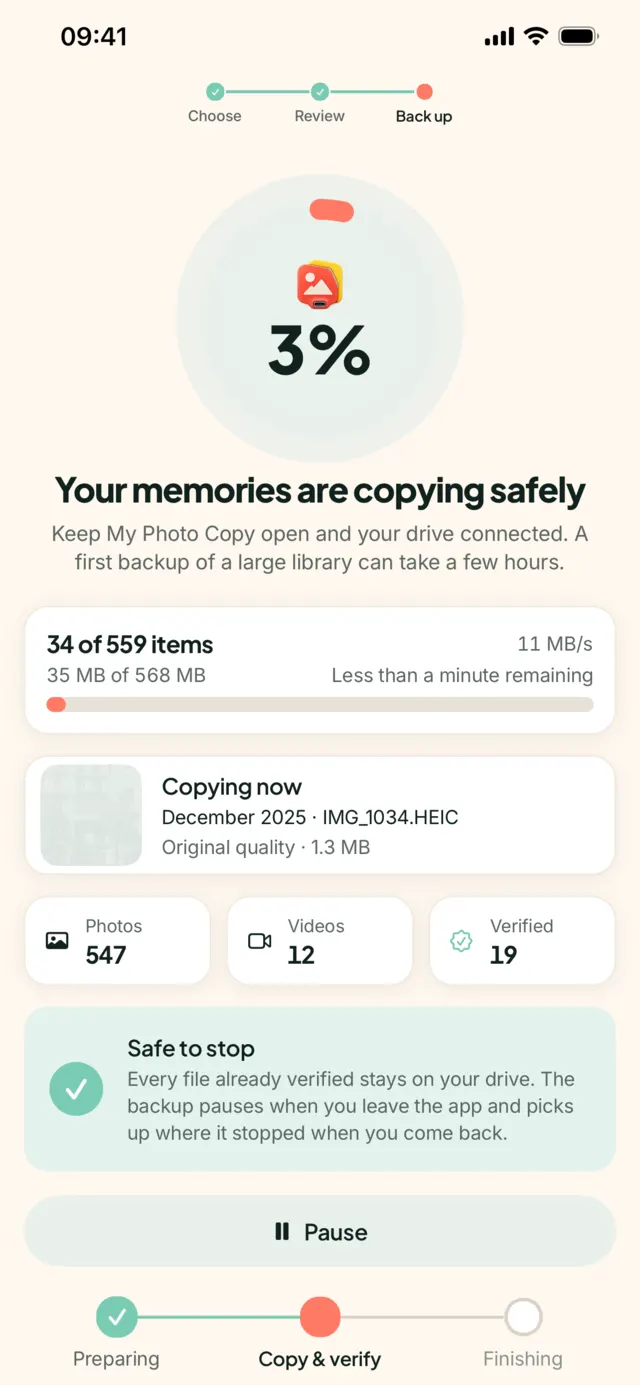
- Start the backup and leave the app on screen with the phone on a charger. iOS pauses apps that leave the screen.
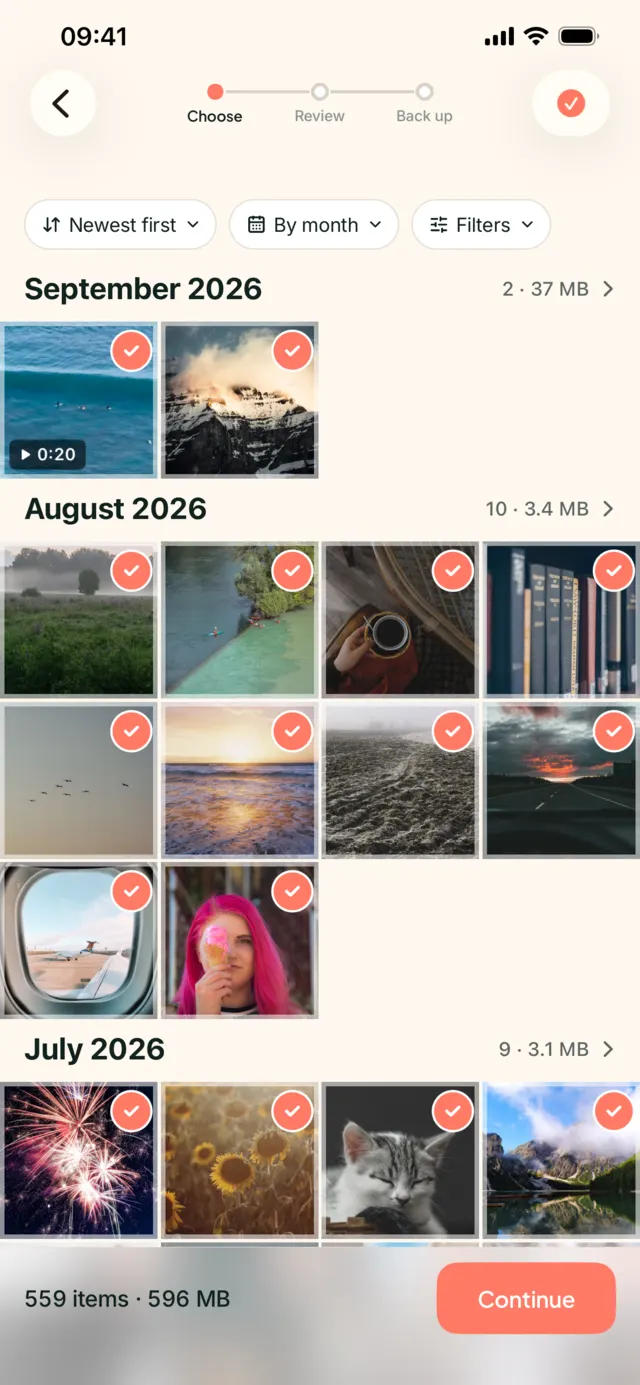
The originals go onto the drive as your iPhone stores them: HEIC, JPEG, PNG, RAW, MOV, 4K and ProRes video, with Live Photos kept as their still-and-video pair. They land in plain folders by year and month, like 2024/07/IMG_4231.HEIC, so any Mac, Windows PC or many TVs can open them without an app. If your originals are in iCloud because Optimise iPhone Storage is on, each one is downloaded first, so start a big run on Wi-Fi.
You can stop at any point and continue later. Progress is saved after every verified file, and each later run copies only what's new since last time.
What “verified” adds
A transfer can look finished and still be incomplete. A cheap stick can report success and store damaged data, a loose cable can cut a file short, and a FAT32 drive quietly refuses big videos. None of that shows up in a folder listing.
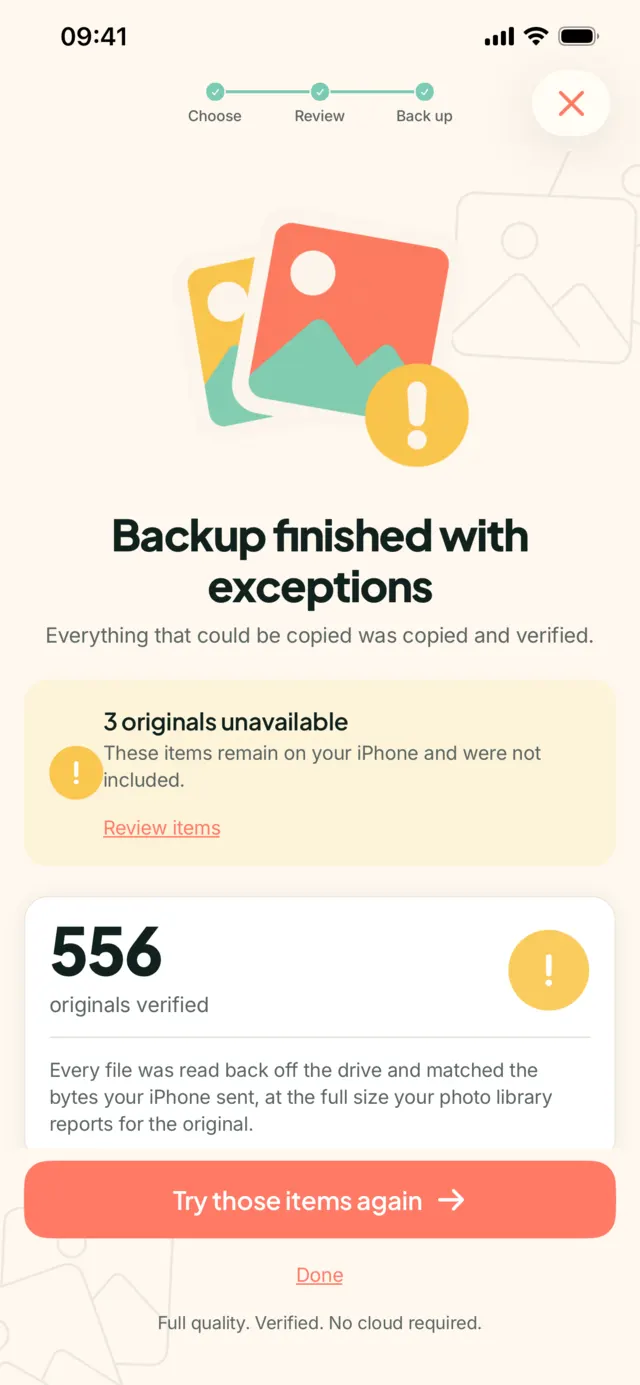
My Photo Copy reads every file back off the drive and checks its SHA-256 against the data your iPhone sent, and its size against what the photo library reports for the original. The run ends with a count such as “18,420 originals verified”, and anything that couldn't be copied is listed by name with the reason. Copied vs verified explains what that check covers and what it can't.
Which one should you use?
| Files app | My Photo Copy | |
|---|---|---|
| Cost | Free | First 250 photos and videos free |
| Good for | A few photos you can check by eye | A whole library, or photos you can't lose |
| Checks the files on the drive | No | Yes, every file |
| Stop and continue later | No | Yes |
| Next time | Pick the new photos by hand | Copies only what's new |
If you're sending a few holiday photos to a stick for a relative, use Save to Files and open them on the stick to be sure. If the drive is where your photos will live when the phone is gone, lost or wiped, use something that tells you each file arrived intact.
Transfer, not move
Neither method deletes anything from the iPhone. That's deliberate: a transfer is a copy until you decide otherwise. If the goal is to free space, wait until the backup is verified, open a few files on another device, and make a second copy somewhere else. One drive is one copy, and drives get lost too. Then delete from the phone. The full walkthrough is in iPhone USB backup without a computer.
Transfer photos you can count on
My Photo Copy copies your originals from the iPhone to a USB stick, SSD or SD card reader and verifies every file. No computer, no cloud, no account. The first 250 photos and videos are free; Pro is a one-time purchase or a yearly plan.