 My Photo Copy
The simplest travel photo backup without a laptop is a small SSD or USB-C flash drive that you plug into your iPhone each evening. The first run at home copies the whole library; on the trip, each evening's run copies only the day's new photos and videos, reads them back to verify them, and takes a few minutes. Then the drive goes in a different bag from the phone.
Why bother on a trip
A trip is when a phone is most likely to be lost, stolen, dropped in water or left in a taxi. It is also when you are taking the photos you care about most. iCloud can cover this if you have the space and a fast connection, but hotel and café Wi-Fi is often too slow for a day of 4K video, and roaming data is expensive. A drive needs neither. Nothing is uploaded.
What to pack
- A portable SSD or a USB-C flash drive. An SSD is faster and tougher; a flash drive is smaller. Size it to your library plus the trip, with room to spare. Guidance in which USB drive for iPhone.
- The right cable or adapter. iPhone 15 and later: a short USB-C to USB-C cable if the SSD needs one. iPhone 14 and earlier: a Lightning stick, or Apple's Lightning to USB 3 Camera Adapter, which has its own charging port.
- A charger. You will run the backup with the phone plugged in. Some SSDs draw more power than an iPhone likes to supply on battery.
- Optional: an SD card reader if you also shoot on a camera.
Format the drive as exFAT before you go. FAT32 can't hold a file over 4 GB, and a long 4K clip from a travel day will hit that. How to format a drive for iPhone.
Before you leave: do the big run at home
The first backup of a whole library is the slow one, especially if Optimise iPhone Storage is on and originals have to download from iCloud first. Do it at home, on your own Wi-Fi, with the phone on a charger and the app open on screen. After that, every run copies only new items, which is what makes an evening routine practical.
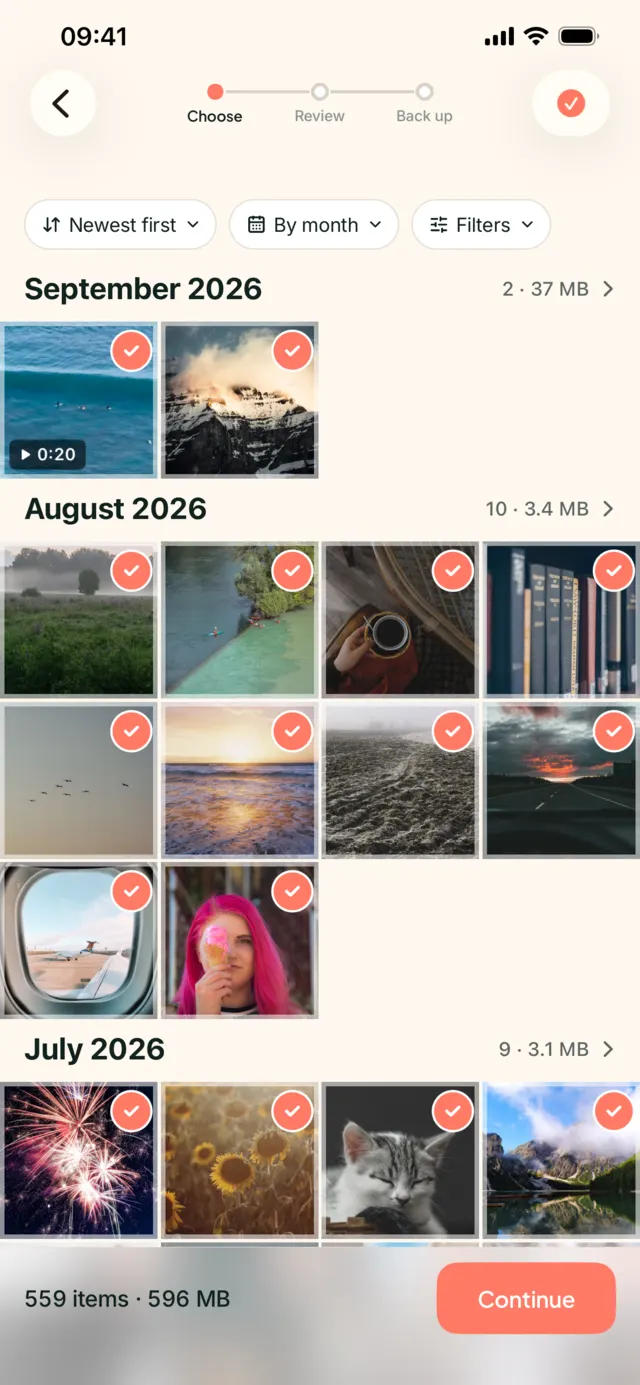
If you don't want your whole library on a drive you're carrying, choose a date range instead, starting from the day you leave. My Photo Copy can back up everything, a month, a date range, albums or just videos.
The evening routine
- Put the phone on the charger and plug in the drive.
- Open My Photo Copy and start the backup. Leave the app on screen, because iOS suspends apps in the background.
- When it finishes, check the result: a verified count and, ideally, nothing listed as not copied.
- Unplug the drive and put it away, somewhere that isn't with your phone.
If you have to leave in the middle of a run, unplug. You can stop anytime and continue later; the next run carries on from where it stopped.
Keep the drive away from the phone
A backup in the same bag as the phone protects you from a broken phone, not a stolen bag. Split them: phone in your pocket, drive in the main luggage or the hotel safe. If you travel with someone, they can carry it. It isn't complicated, but it's the part people skip.
My Photo Copy does not encrypt the drive. Anyone who has the drive can open the photos, the same as any USB stick. Keep that in mind when deciding where it lives.
Photos from a camera
My Photo Copy backs up the iPhone's photo library. To include photos from a camera's SD card, plug in an SD card reader and import them into Photos, then run the backup. RAW files are copied as RAW. Leave the camera's own card untouched until you're home, and you have a third copy for free.
What about iCloud on the road
If Optimise iPhone Storage is on, older photos may be stored only in iCloud with a small version on the phone. The evening run usually won't need them, because new photos normally stay on the phone at full quality for a while. If the phone is nearly full, iOS may move even recent originals to iCloud sooner. But if you choose to back up older months while travelling, those originals have to download first, and slow Wi-Fi will make that painful. Leave them for home. More on how iCloud storage works in iCloud storage full.
Don't clear the phone mid-trip
It is tempting to delete videos to make room once they're on the drive. While you're travelling, the phone and the drive are your two copies, and the drive is the one most easily lost. If you really need the space, make sure the run is verified first and open a couple of the files on another device if you can. Otherwise, wait until you're home and have made a second copy. Why that check matters: copied vs verified.
When you get home
Plug the drive into a Mac or PC and look at the folders: they're plain dated folders like 2026/08/IMG_5120.HEIC. Copy them to a second drive or your computer. Then, if you want the space back, delete from the phone. Photo Trim can help clear duplicates and screenshots from the trip.
Back up the trip, not just the phone
My Photo Copy copies new photos and videos to your drive each evening and verifies every file. No laptop, no uploads, no account. Free for the first 250 photos and videos.

First time backing up to a drive? Read iPhone USB backup without a computer. Drive not showing up? See fixing "accessory not supported".